
I must admit, I was obsessed with creating the perfect boy room. My biggest criteria was that I wanted a room that I could stand to go into - meaning not overly kid/baby -ish. I was pretty dismayed by many of the nursery products I saw, and I was absolutely horrified by the Babies 'R Us suggested registry items for the nursery. (No way was I putting up a wallpaper border, caricature light covers, or wall decals of any kind.)
Around 27 weeks, I had a total freak-out moment after reading some article online that said furniture needed to be ordered during the second trimester. And I was now late. Looking back, this was absurd. The baby didn't even spend time in his room until he was 3 months old. The only piece of furniture we used was the dresser to store his more than ample supply of clothing. That weekend was the great nursery hunt. Fortunately, my obsessive self had a very detailed inspiration board, and we were able to purchase or draw up plans for everything in the room in about 3 hours. My husband and I both grew up sailing, so our "nod towards nautical" theme was easy to agree on. Here's a fish-eye view of the result:
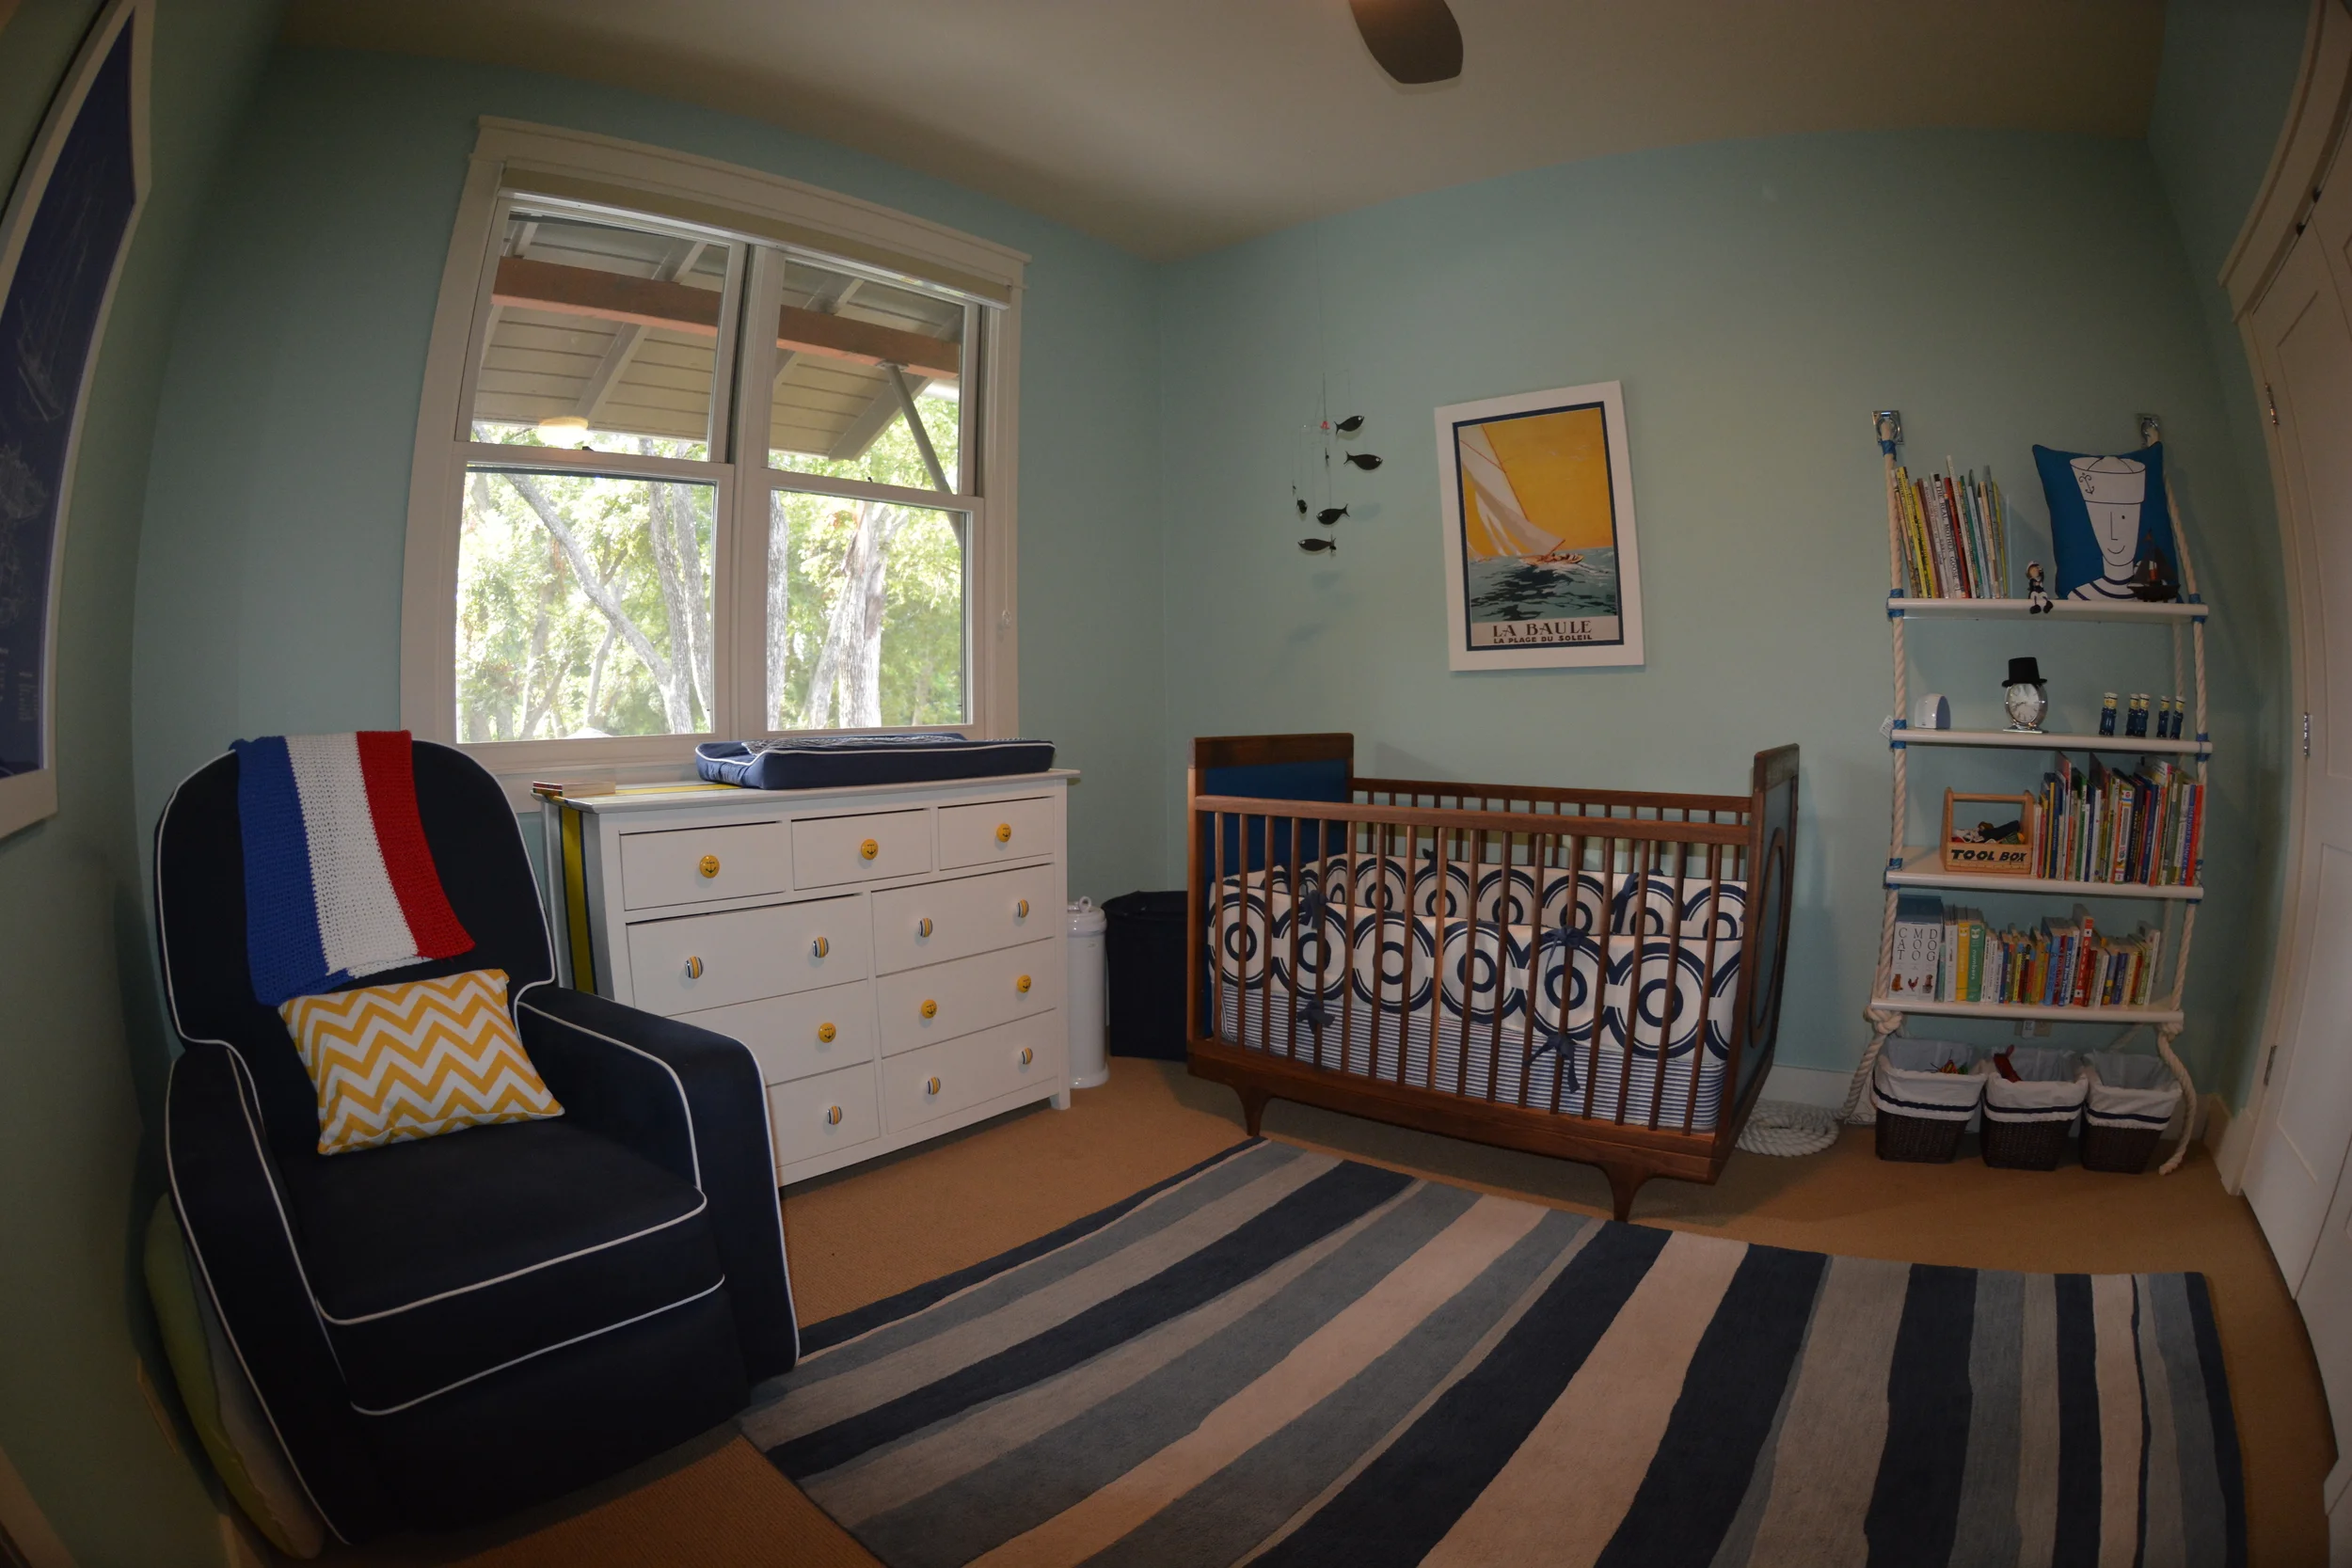
A fish-eye view of the complete room.
Our wall color is PPG's Malted Mint.
Stay tuned for more posts on our beautiful crib and dresser.
One of my favorite pieces in the room is this rope bookshelf. My handy husband (don't call him crafty!) built it after I pinterested him to death.
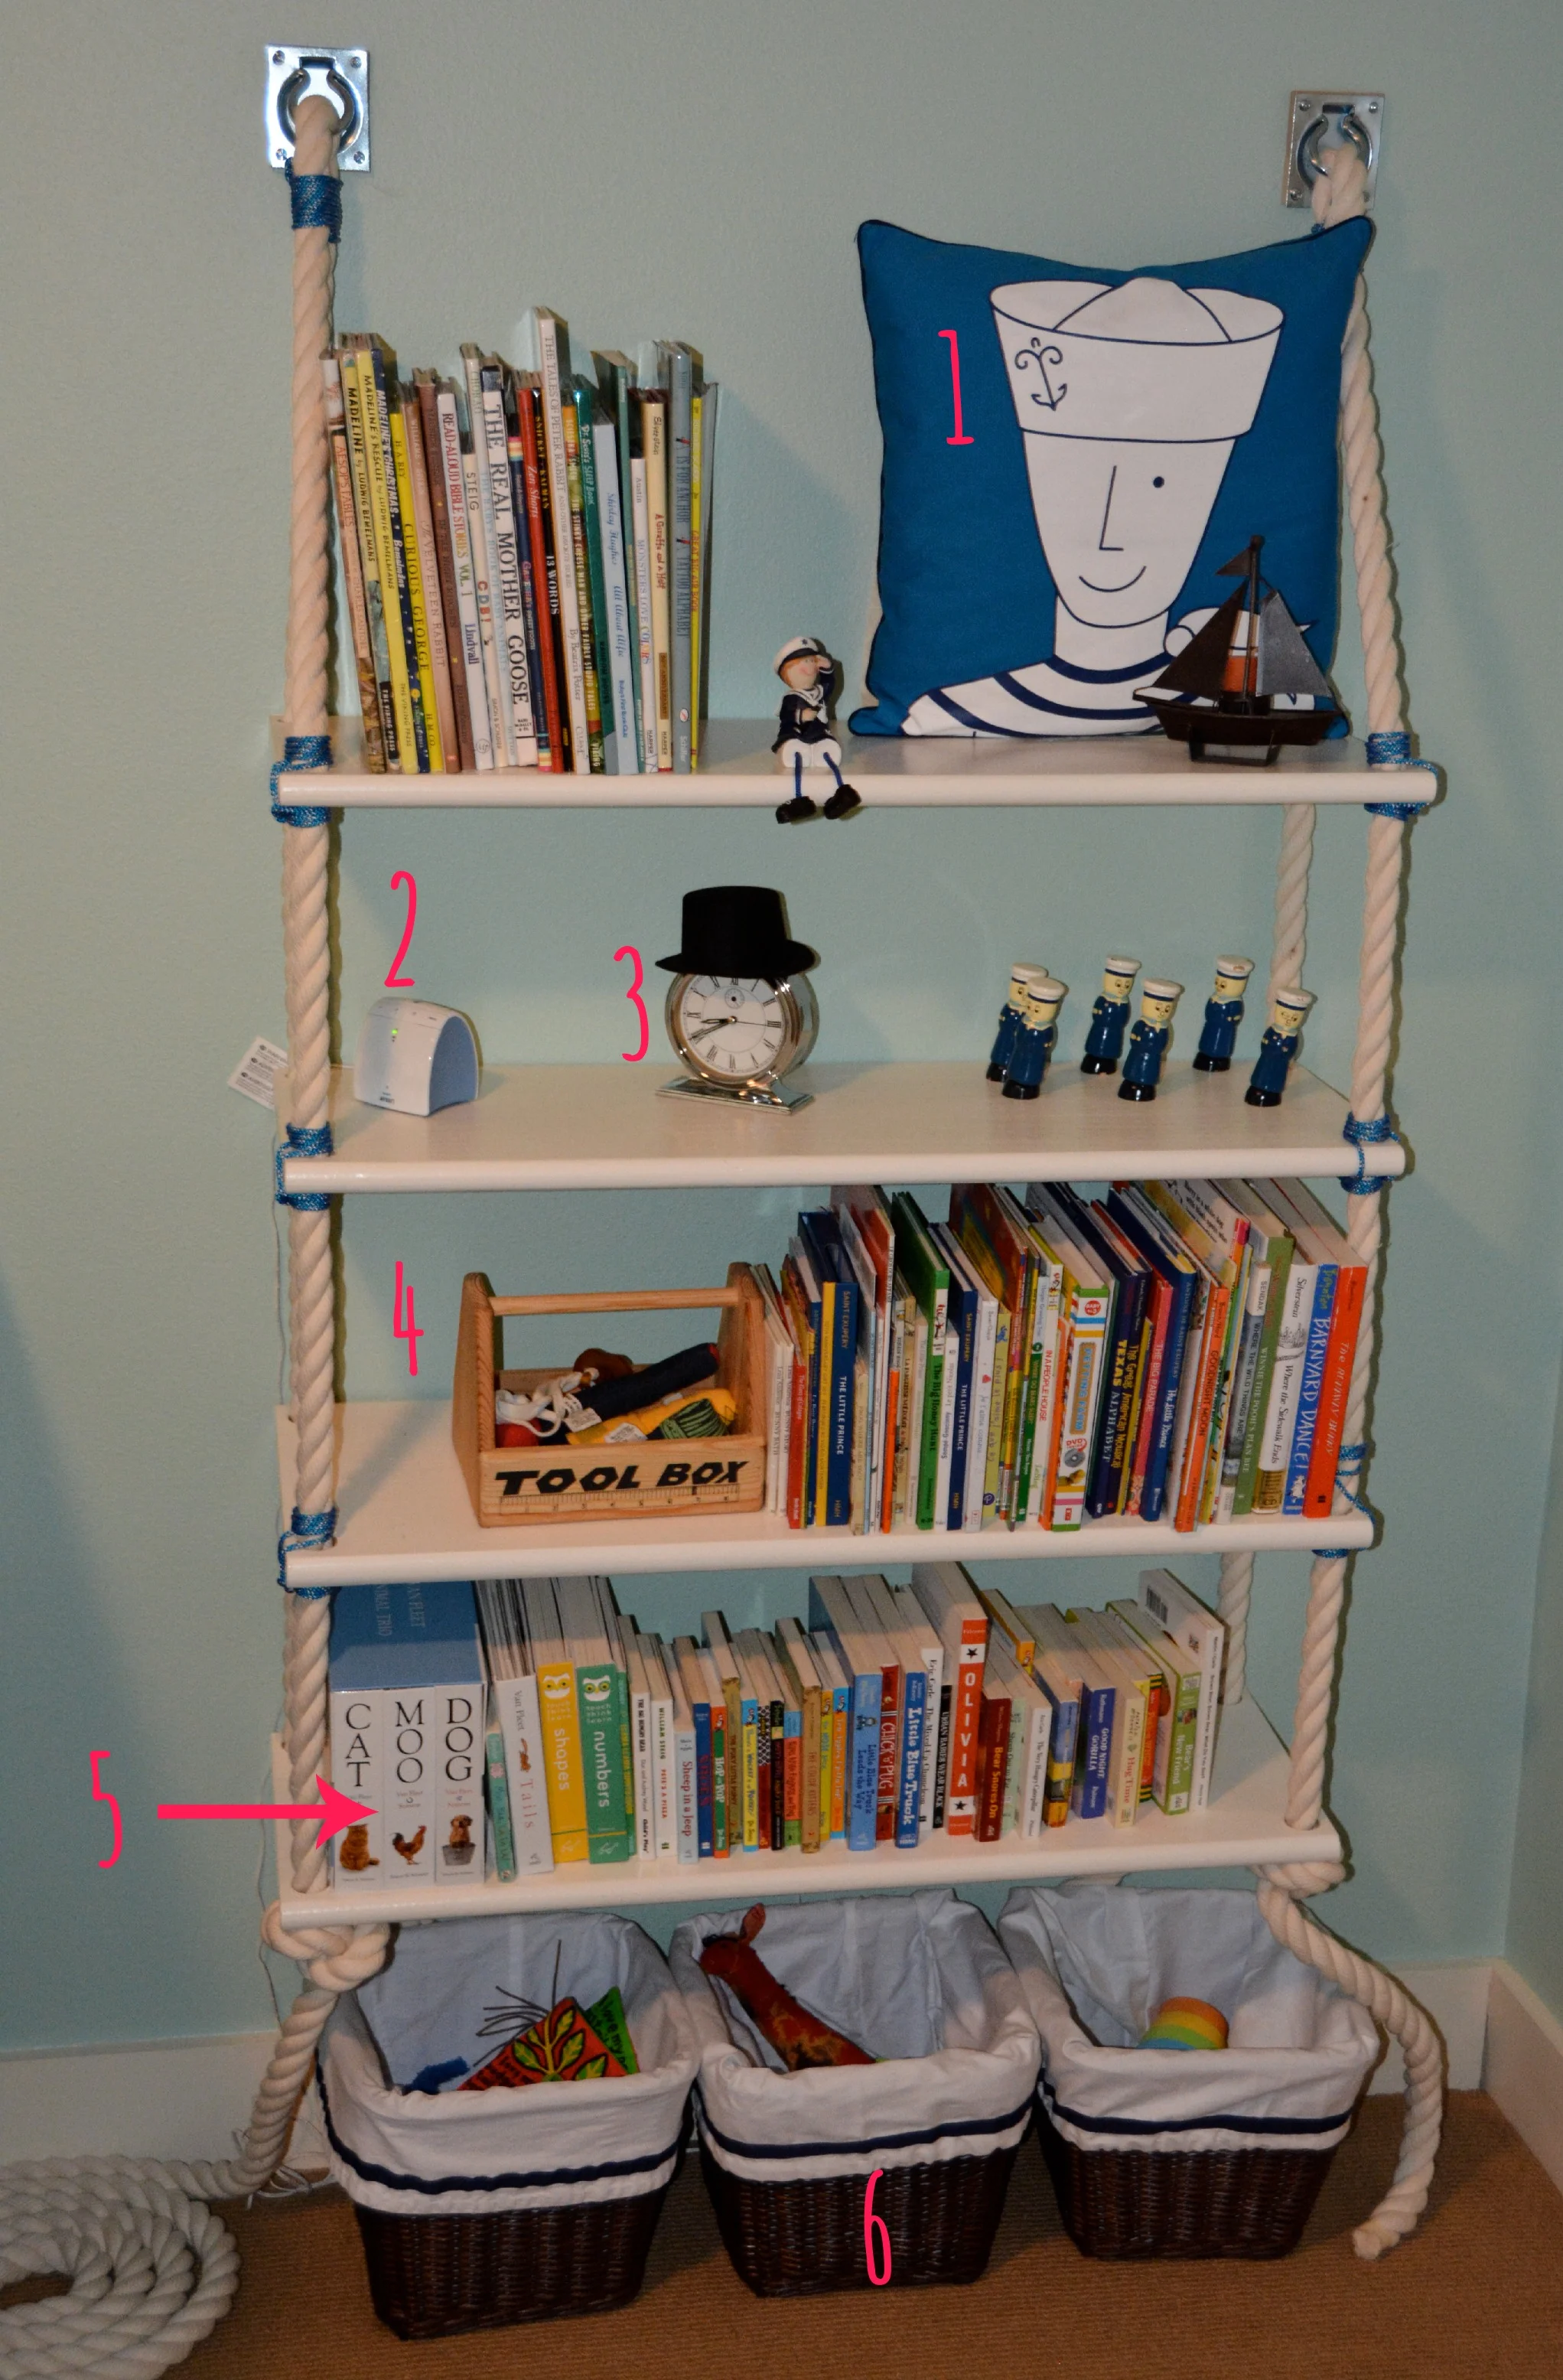
The rope on the bookcase adds a fun twist without being too kitschy.
1. Ahoy Matey Pillow - This was the inspiration piece for the whole room. Unfortunately, it isn't very soft so I wouldn't want to actually use it as a pillow. However, it makes a lovely accent.
2. Avent DECT Baby Monitor - I didn't want a video monitor. I know this is practically blasphemy these days, but I didn't want to spend my "me" time staring at a video display of my baby. The Avent monitor is wonderful because it has a long range (2000 feet!) and is incredibly clear.
3. Infinity Clock - I can't tell you how often I've checked this clock over the past year. It is clean and simple and isn't a bright digital clock that will keep my baby up at night.
4. Under the Nile Tool Box - The plush tools inside have been popular from the very beginning.
5. Matthew Van Fleet Animal Trio: Moo; Cat; Dog - These interactive books are Robert's favorite. I'm not exaggerating when I say that we read them every single day. He loves the pop ups and animal textures.
6. Pottery Barn Kids Sabrina Baskets in Espresso with Navy Harper Liners - Simple baskets on the ground are a great way to store toys and start teaching clean up. The white and navy work perfectly with our theme.
To create this awesome bookshelf, you'll need:
- 4 oak stair treads
- 1.5" cotton three strand rope. We used about 30' of rope.
- Small polyester double braid rope. We used about 30' of colored double braid.
- 4 pieces of angle iron
- 2 pad-eyes
- Paint - we used PPG's Cookie Crumb
To assemble:
- Cut the shelves to length.
- Cut the angle iron 6" shorter than the length of the shelf. Cut 1 piece per shelf.
- Drill a 1.5" diameter hole in all four corners of the shelves.
- Prime and paint the shelves. I suggest using rollers designed for smooth surfaces. Spend the time to prime first. It makes a huge difference!
- Attach the angle iron to the wall at the level for each shelf. Our shelves are 14" apart.
- Attach the pad-eyes to the wall 18" above the top shelf and in line with the holes drilled into the stair treads.
- Run the 1.5" cotton three strand through the shelves and through the pad-eyes. The front of each shelf is the rounded edge.
- Take the top shelf and mount it to the angle iron.
- Keep the front edge of the shelf level by either:
- Tying the double braid around the front edge of the shelf - like our top three shelves; or
- Tying a knot in the three strand below the shelf to hold it in place - like the bottom shelf.
- Use a level to double check the position of the shelf. Make adjustments as necessary.
- Continue with each shelf from the top down.
- After awhile, you may find that the cotton three strand stretches. Just retie the knots to lift the shelves back up. We chose cotton (as opposed to a stiffer hemp or manila) rope because it is soft to touch, and Robert is a hands-on little boy! The downside is the stretch factor.